

 English
 English
 русский
 Français
 Español
 Português
 عربى
عربى
Cat:Glue -coated Protective Film
● Good weatherability for outdoor exposure; ● Stable adhesion level; ● UV resistance for up to 12 months; ● Can print customized logo or application i...
See Details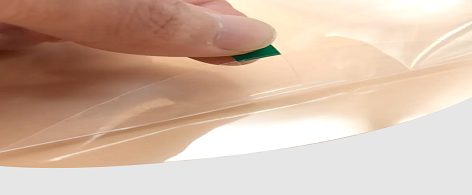
Self-adhesive films (often referred to as vinyl wrap, contact paper, or architectural film) are the premier choice for furniture refurbishment, commercial interior design, and glass privacy enhancements. To achieve a “bubble-free” professional finish that mimics factory-grade quality, following a precise, industry-standard application process is essential.
The secret to a long-lasting bond lies not in the film itself, but in the preparation of the substrate.
Adhesives are highly sensitive to microscopic contaminants. Even a fingerprint can cause premature lifting.
Using the right tools differentiates a DIY look from a commercial-grade installation:
Never cut the film to the exact size of the object immediately.
To help you choose the right approach for your project, refer to the technical table below:
| Surface Material | Difficulty Level | Recommended Method | Key Consideration |
|---|---|---|---|
| Smooth Wood / Metal | Low | Dry Application | Ensure zero dust contamination |
| Glass / Acrylic | Medium | Wet Application | Requires squeegeeing out all water |
| Laminate / PVC | Low | Dry Application | Check edge-banding for stability |
| 3D / Curved Surfaces | High | Heat Stretching | Avoid over-stretching (prevents discoloration) |
A: If the film is already fully adhered, do not force it up. Use a fine needle to prick a tiny hole at the edge of the bubble and use your finger to push the air out.
A: The wet method (using a water/soap solution) is primarily for window films. It allows the film to “float” and slide for perfect positioning before the water is squeezed out to activate the bond.
A: High-quality architectural films typically last 5–10 years indoors. For outdoor use, lifespan depends on UV-resistance ratings, usually ranging from 2–5 years before fading or embrittlement occurs.

● Good weatherability for outdoor exposure; ● Stable adhesion level; ● UV resistance for up to 12 months; ● Can print customized logo or application i...
See Details, Polyester (PET) aAnd Polycarbonate (PC) Etc")
● No “ghost shadow” or “fish eye” after removal; ● Low gel content, soft and stable adhesion plus easy-peel removal with no surface damage or curling;...
See Details
● Patented adhesive formula suits all hard surfaces such as hardwood floors, laminate floors, ceramic, marble, tile, granite, vinyl, worktops, and gla...
See Details
● The super-tough polyethylene film resists puncture and penetration by liquid and dirt during storage, transportation, and installation of the ductwo...
See Details
● The super-tough polyethylene film resists puncture and penetration by rain, snow, debris, and dirt during the transportation and storage of the cras...
See Details
● The super tough polyethylene film with super high adhesion can stop parts of the glass or mirror from splintering away and injuring people when it i...
See Details... Etc.")
● The specially formulated adhesive ensures easy application and removal without leaving residue glue; ● The super-tough polyethylene film protects ag...
See Details
● Waterproof - the desirable material for waterproofing. ● Dust-proof - positive performance of dust prevention.● Low resilience - prevent the deforma...
See Details
● Excellent puncture and tear resistance; ● Self-adhering-each layer of film bonds to the next for added strength; ● Big roll size to save cost and re...
See Details
This product has non-woven synthetic fleece in middle; PE film adhered onto top of the non-woven fabric, which is coated with self adhesive glue on it...
See DetailsWe’re a reliable partner that shapes our expertise into success for your project.
Copyright 2024 Wuxi Qida Tape Co., Ltd. All Rights Reserved
 Wholesale Protective Film/Foil Manufacturers
Privacy
Wholesale Protective Film/Foil Manufacturers
Privacy